- Añadir capa a través del protocolo WMS
- Introducción
- Conexión al servicio
- Acceso al servicio
- Selección de "Capas"
- Selección de "Estilos" sobre las capas del servidor WMS
- Selección de valores para las "Dimensiones" de una capa WMS
- Selección de formato, sistema de coordenadas y/o transparencia
- Añadir una capa WMS a la vista
- Modificación de las propiedades de una capa
Añadir capa a través del protocolo WMS
Introducción
Part of the gvSIG philosophy in its creation included the implementation of open standards for access to spatial data. Thus, gvSIG includes a WMS client which complies with the current OGC (Open Geospatial Consortium, http://www.opengeospatial.org) standard.
Conexión al servicio
Go to the "Add layer" window and then select the WMS tab.
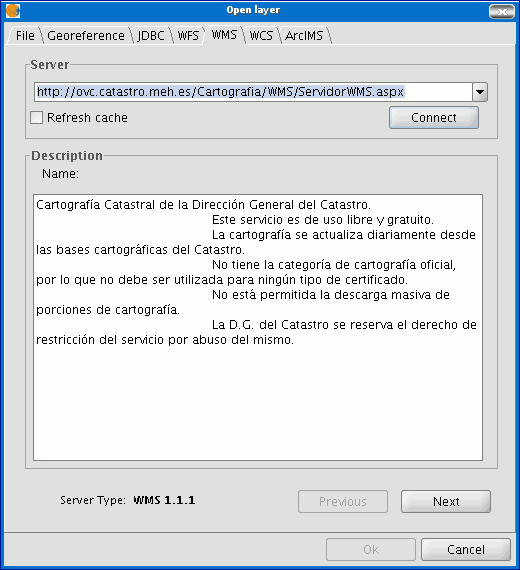
- The pull-down menu shows a list of WMS servers (you can add a different server if you don’t find the one you want).
- Click on “Connect”.
- and 4. When the connection is made, a welcome message from the server appears, if this has been configured. If no welcome message appears, you can check whether you have successfully connected to the server if the “Next” button is enabled.
- The WMS version number that the connection has been made to is shown at the bottom of the box.
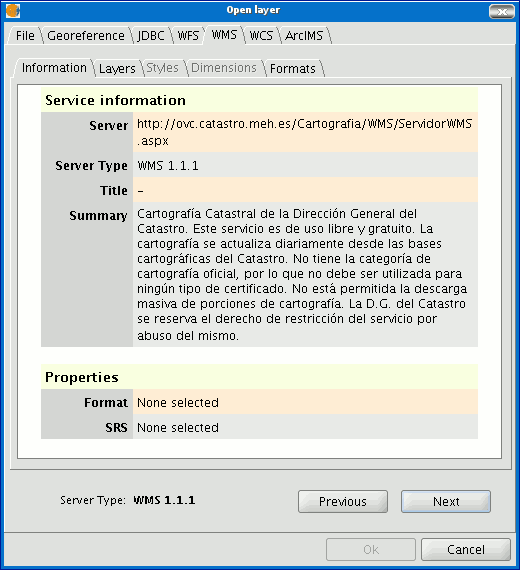
Acceso al servicio
Click on “Next” to start configuring the new WMS layer.
When you have accessed the service, a new group of tabs appears.
The first tab in the adding a WMS layer wizard is the information tab. It summarises the current configuration of the WMS request (service information, formats, spatial systems, layers which make up the request, etc.). This tab is updated as the properties of its request are changed, added or deleted.
Selección de "Capas"
The wizard’s “Layers” tab shows the WMS server’s table of contents.

Select the layers you wish to add to your gvSIG view and click on “Add”. If you wish, you can choose a name for the layer in the “Layer name” field.
N.B. Several layers can be selected at the same time by holding down the “Control” key and left clicking on the mouse.
N.B. To obtain a layer description move the cursor over a layer and wait a few seconds. The information the server has about these layers is shown.
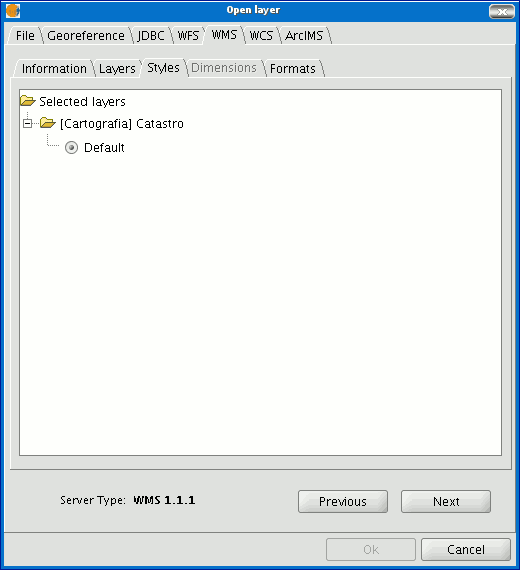
Selección de "Estilos" sobre las capas del servidor WMS
The “Styles” tab allows you to choose a display view for the selected layers. However, this is an optional property and the tab may be disabled because the server does not define styles for the selected layers.
Selección de valores para las "Dimensiones" de una capa WMS
The “Dimensions” tab helps to configure the value for the WMS layer dimensions. However, the dimensions property (like the styles property) is optional and may be disabled if the server does not specify dimensions for the selected layers.
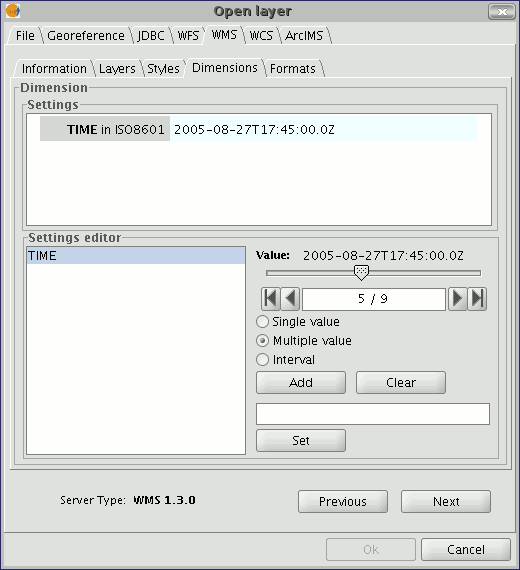
No dimension is configured by default. To add a dimension, select one from the “Settings editor” area in the list of dimensions. The controls in the bottom right-hand corner of the tab are enabled. Use the slider control to move through the list of values the server has defined for the selected dimension (for example “TIME” refers to the dates the different images were taken). You can move back to the beginning, one step back, one step forward or move to the end of the list using the navigation buttons which are located below the slider control. If you know the position of the value you require, you can simply write it in the text field and it will move automatically to this value.
Click on “Add” so that you can write the selected value in the text field and request it from the server.
gvSIG allows you to choose between:
Single value: Only one value is selected
Multiple value: The values will be added to the list in the order they are selected in
Interval: An initial value and then an end value are selected
When the expression for your dimension is complete, click on “Set” and the expression will appear in the information panel.
N.B. Although each layer can define its own dimensions, only one choice of value is permitted (single, multiple or interval) for each variable (e.g. for the TIME variable a different image date value cannot be chosen in each layer).
N.B. The server may come into conflict with the layer combination and the variable value you have chosen. Some of the layers you have chosen may not support your selected value. If this occurs, a server error message will appear.
N.B. You can personalise the expression in the text field. The dialogue box controls are only designed to make it easier to edit dimension expressions. If you wish you can edit the text field at any time.
Selección de formato, sistema de coordenadas y/o transparencia
The “Formats” tab allows you to choose the image format the request will be made with, specify if you wish the server to hand in the image with a transparency (to superimpose the layer onto other layers the gvSIG view already contains) and also the spatial reference system (SRS) you require.
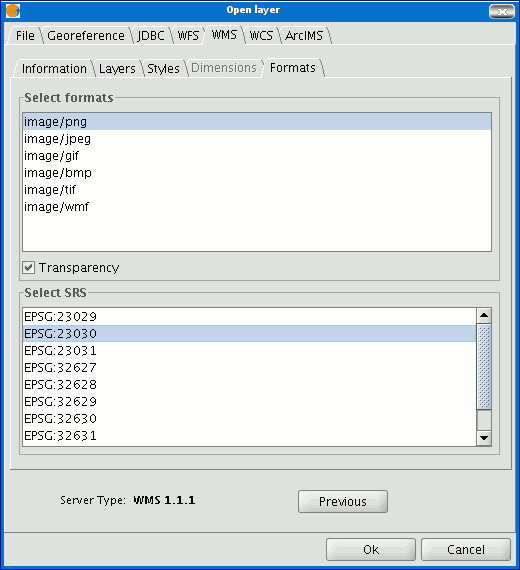
Añadir una capa WMS a la vista
As soon as the configuration is sufficient to place the request, the “Ok” button is enabled. If you click on this button, the new WMS layer will be added to the gvSIG view.
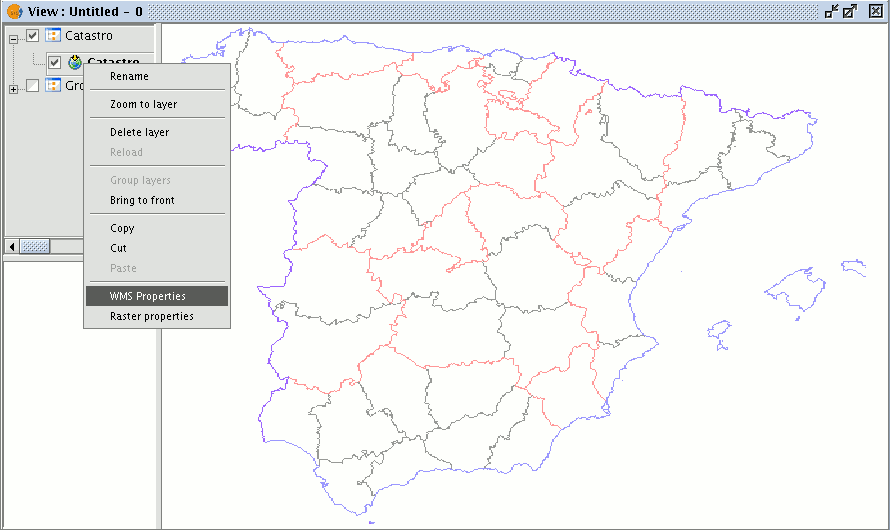
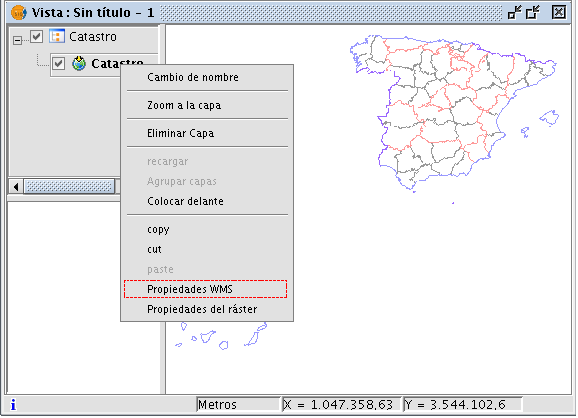
Modificación de las propiedades de una capa
Once the layer has been added its properties can be modified. To do so, go to the Table of contents in your gvSIG view and right click on the WMS layer you wish to modify. The contextual menu of layer operations appears. Select “WMS Properties”. The “Config WMS layer” dialogue window appears. This is similar to the wizard for creating the WMS layer and can be used to modify its configurations.